Getting Started
Install ClassicTunes, add your music, connect your iPod and run your first sync, checking it first with Preview Sync.
ClassicTunes does what iTunes used to do for classic click-wheel iPods. It keeps your music, videos, podcasts, audiobooks and photos in a library of its own, and syncs them to your iPod. You don't need iTunes, the Music app or Finder to sync.
This page takes you from downloading the app to a synced iPod. It takes a few minutes, plus however long your music takes to copy.
What you need
- A Mac with macOS 12 Monterey or later, Apple silicon or Intel.
- A supported iPod and its USB cable. The iPod classic, iPod with video, iPod nano (1st and 2nd generation), iPod photo, iPod mini and the original click-wheel iPods are fully supported; some others are expected to work or are experimental. See Supported iPods for every model.
- Your music: files on your Mac, songs in the Music app, or CDs.
Install ClassicTunes
- Download ClassicTunes.
- Open the downloaded file and drag ClassicTunes to your Applications folder.
- Open ClassicTunes from Applications or Launchpad.
ClassicTunes is signed and notarized by Apple, so it opens like any other app. It keeps itself up to date; see Updates.
A quick tour
The window works like iTunes or the Music app: a sidebar on the left, and what you pick on the right.
The sidebar has these sections, from top to bottom:
| Section | What's in it |
|---|---|
| iPods | Each connected iPod. Click one to open its page and sync it. Until one is plugged in, it says "No iPod connected". |
| Music Players | Players that aren't iPods, and SD cards (only when one is plugged in). See Music players. |
| CDs | An audio CD in a drive (only when there is one). See Importing CDs. |
| Cameras & Cards | Memory cards and cameras to import photos from (only when one is connected). See Photos. |
| Library | Music (with Artists, Albums and Songs), Videos, Podcasts, Audiobooks, Photos, Playlists and History. Once you have more than one library, this heading shows the library's name. |
| Playlists | Your playlists, with New Playlist… and New Smart Playlist… at the bottom. |
The play controls, what's playing and the volume are in the middle of the toolbar.
Add your music
The first time you open ClassicTunes, the library is empty and Music says "No Music Yet", with buttons to get started. There are three ways to bring music in, and you can use all of them.
Import from the Music app
Choose File › Import from Music App… (⇧⌘I), or click Import from Music App….
- The first time, macOS asks whether ClassicTunes may access your media library. Click OK (or Allow).
- ClassicTunes lists every song in the Music app, with a status for each: Ready to Import, Already Imported, Not Downloaded or Can't Import.
- Click Import All … Ready to import everything that can be imported, or select some songs and click Import Selected. Turn on Also import playlists to bring your playlists too.
The songs are copied into ClassicTunes' own library, so it never depends on the Music app afterward. A few songs can't come across:
- Songs from an Apple Music subscription are copy-protected, and no iPod can play them. They're listed as Can't Import.
- Songs that live only in iCloud show as Not Downloaded. Select them and click Download in Music, and they become ready once Music has fetched them.
- Songs you bought from the iTunes Store, ripped from CDs or added as files import normally.
Add files and folders
Choose File › Add Music or Videos to Library… (⌘O), or click Add Files…, then pick songs, videos or whole folders. You can also drag them from Finder onto the Music section.
ClassicTunes reads FLAC, MP3, AAC, Apple Lossless, WAV and AIFF, plus Ogg Vorbis, Opus, WMA, Musepack, DSD, Monkey's Audio, WavPack and TTA. Songs in a format the iPod can't play are converted for it when they sync, so you don't need to convert anything first.
Before anything is added, the Add to Library window shows each album as it will be added, fills in missing details and covers from Apple and MusicBrainz where the album clearly matches, and lets you correct anything. Nothing changes until you click Add. See Adding music for every option.
Import CDs
Insert an audio CD and it appears in the sidebar under CDs, with its details looked up on MusicBrainz. Click Import CD. See Importing CDs.
Tip: Files you add are copied into the library's folder, sorted by artist and album, so the library keeps working if you move or delete the originals. To leave files where they are instead, turn off Copy files into the library when adding them in Settings › General › Adding songs.
Connect your iPod
Plug your iPod into your Mac with its USB cable. After a few seconds it appears in the sidebar under iPods, and its page opens.
The first time you connect an iPod, ClassicTunes asks which library it should use. If this is your only library, choose This library and click Use This Library.
Tip: If you see "Your iPod Was Ejected" right after plugging it in, Finder is managing the iPod. Select the iPod in Finder's sidebar and, on the General tab, turn off "Automatically sync when this iPod is connected", turn on "Enable disk use" (or "Manually manage music"), click Apply, then reconnect the iPod.
See Connecting an iPod for everything on the iPod's page.
Choose what goes on the iPod
On the iPod's page, Sync Options sets what this iPod gets:
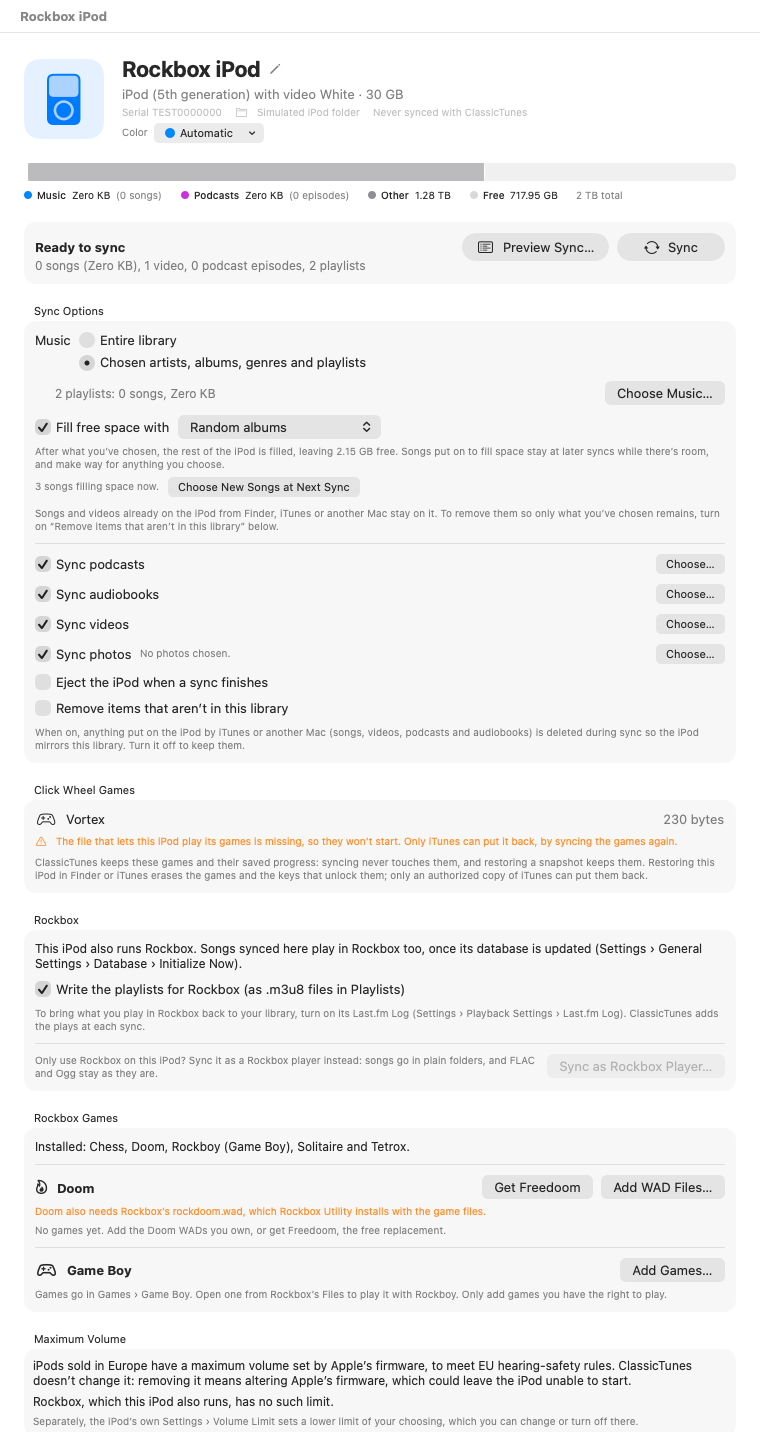
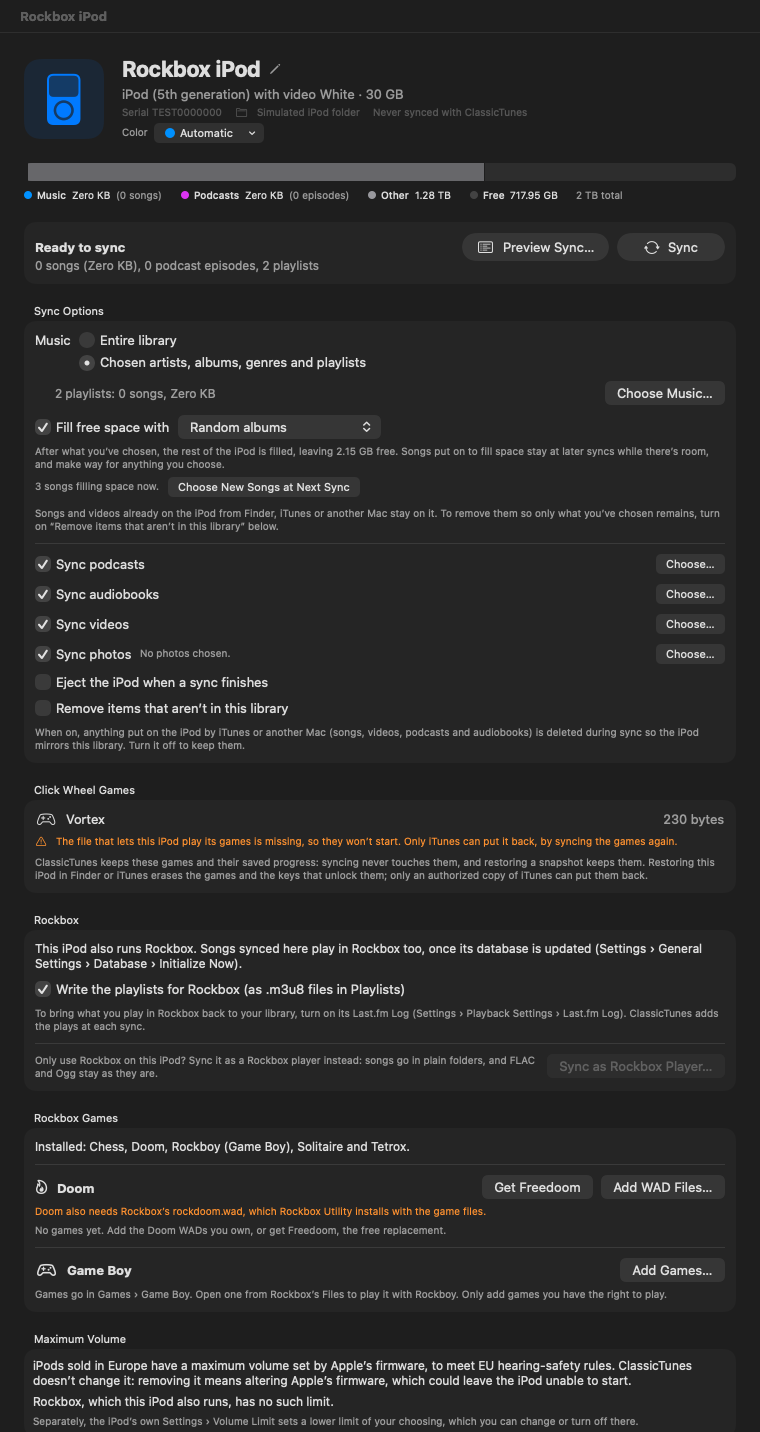
- Music: Entire library, or Chosen artists, albums, genres and playlists. With the entire library, Leave Some Out… lets you uncheck albums, songs or playlists. With chosen music, Choose Music… picks what goes, with a running total against the iPod's capacity, and Fill free space with can top the iPod up with more songs.
- Sync podcasts, Sync audiobooks, Sync videos and Sync photos, each with Choose… to leave some out. On an iPod whose firmware has no Podcasts menu, or that has no color screen for photos, that option is turned off and says why.
- Eject the iPod when a sync finishes.
- Remove items that aren't in this library: when on, songs, videos, podcasts and audiobooks put on the iPod by iTunes or another Mac are deleted during the sync, so the iPod mirrors this library. Leave it off to keep them.
The sync panel above shows what a sync will put on the iPod: the number of songs and their size, videos, photos, podcast episodes and playlists. If what you've chosen is more than the iPod holds, it says so before you sync. See Syncing for every option.
Check first with Preview Sync
Before your first sync, it's worth seeing exactly what will happen. Click Preview Sync… on the iPod's page, or choose iPod › Preview Sync… (⌥⌘S). You can also right-click the iPod in the sidebar.
ClassicTunes compares your library with the iPod without changing anything on it, and lists:
- Add: what will be copied, marked when it's Converted first, comes From Photos, or Fills free space.
- Remove: what will be deleted from the iPod, with items that didn't come from this library marked Not from this library.
- Playlists: which playlists are New, Changed, Unchanged or Removed.
- Left Off: songs that won't go on, and why.
- Free now and Free afterward, or how much more space is needed if it won't fit.
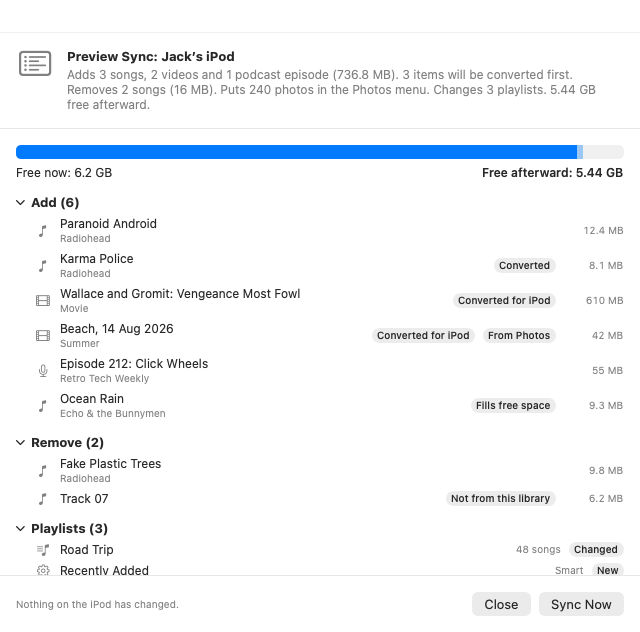
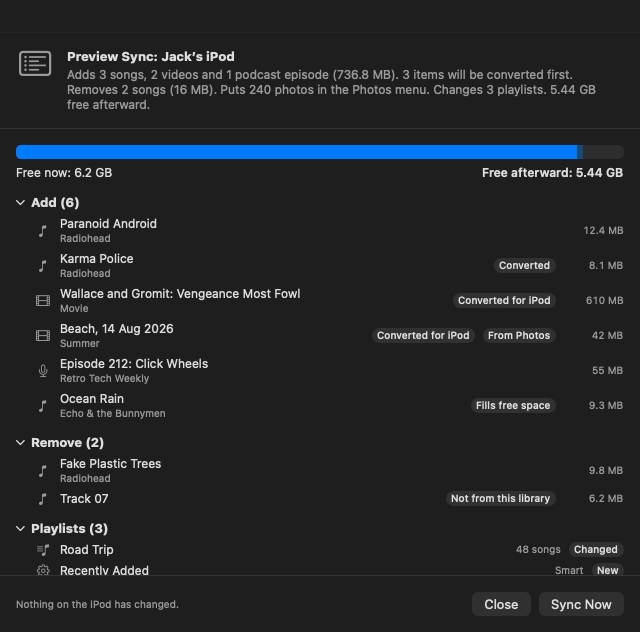
If it looks right, click Sync Now. Otherwise click Close, change the Sync Options and preview again. See Preview Sync.
Sync
Click Sync on the iPod's page, or choose iPod › Sync (⌘S).
Before an iPod's first sync, ClassicTunes offers to take a snapshot of the iPod as it is now: Take Snapshot, Then Sync or Sync Without Snapshot. A snapshot lets you put the iPod back exactly as it was, so it's a good idea the first time, especially if the iPod has music you don't have anywhere else. A full iPod can take a while to copy. See Snapshots.
While the sync runs, the page shows its progress and a Cancel button. When it finishes, it says what happened; Details shows the full log. Only what changed is copied at later syncs, so they're much quicker than the first.
Play counts, ratings and On-The-Go playlists from the iPod come back into your library at each sync.
Tip: If your iPod already has music that isn't in your library, bring it in first with Import Media from iPod… on the iPod's page. Nothing on the iPod changes. See iPod tools.
Eject the iPod
When the sync has finished, eject the iPod before you unplug it: click the eject button beside it in the sidebar, click Eject on its page, or choose iPod › Eject (⌘E).
Where to go next
- Your library: browsing, editing song details, ratings and removing songs.
- Artwork: finding missing covers and replacing small ones.
- Playback: playing music on your Mac, Up Next, the equalizer and AirPlay.
- Playlists: playlists and smart playlists.
- Podcasts and Audiobooks.
- Syncing: every sync option, and filling free space.
- Snapshots: backing up and restoring a whole iPod.
- Several libraries: a library for each iPod, or for each person.
- Keyboard shortcuts and Settings.
- Something not working? See Troubleshooting and the FAQ.
From AppleScript and Shortcuts
Once an iPod has been synced from ClassicTunes, scripts and shortcuts can sync it too. This syncs every connected iPod that belongs to the open library:
tell application "ClassicTunes" to syncIn Shortcuts (macOS 13 and later), use Sync iPod, Preview iPod Sync and Eject iPod, and Add to ClassicTunes to add files. See AppleScript and Shortcuts.